Russian Manicure: What It Is, Step by Step and Aftercare
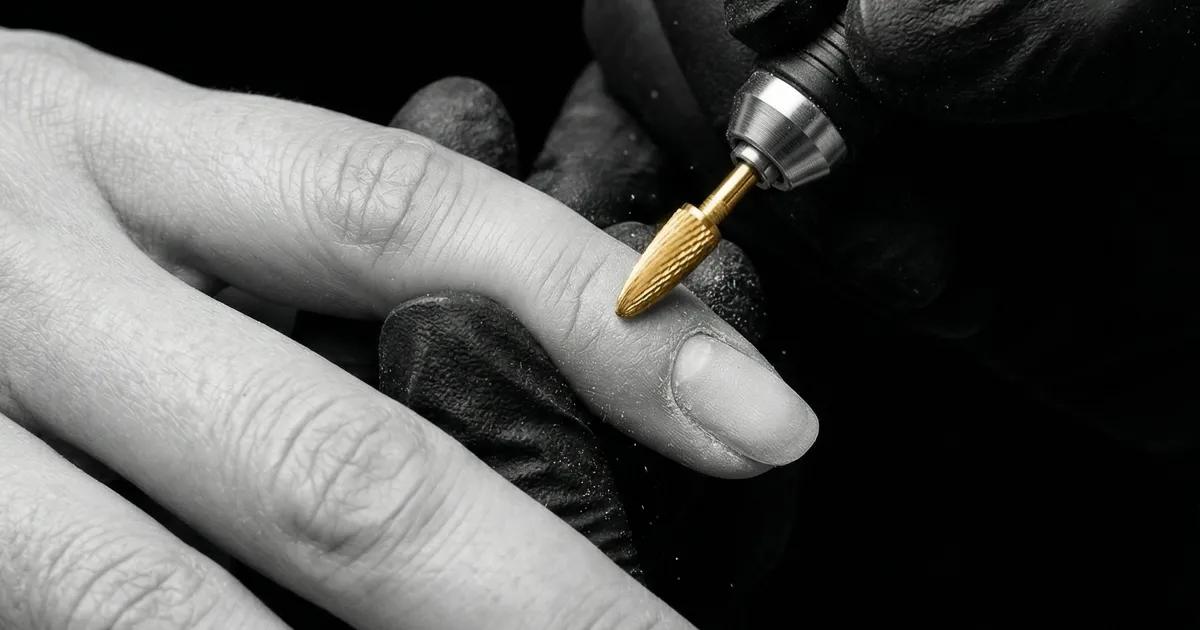
A Russian manicure preps the nail and cuticle with precision electric bits on dry nails, with no soaking. How it’s done, how it compares with a traditional manicure and how to look after it.
A Russian manicure is a nail and cuticle prep technique that uses precision electric bits on dry nails, with no soaking beforehand. Unlike the classic method with an orange stick and nippers, the Russian technique removes cuticle more cleanly and precisely, creating a perfect surface so that any finish —gel polish, gel or even a natural look— adheres better and lasts longer.
In this guide you'll find out exactly how the Russian technique is done step by step, how it differs from a traditional manicure, its real advantages and the aftercare you need after each appointment.
What Is a Russian Manicure and Why Is It Different?
A Russian manicure, also called a combination manicure or e-file manicure, is a cuticle treatment method developed in Eastern European salons that has become a benchmark for quality in the nail industry across Europe.
The key difference from a traditional manicure comes down to one thing: the tool. While the classic method works the cuticle with a metal pusher, nippers and warm water, the Russian technique uses a professional micromotor (e-file) fitted with diamond bits in various shapes and sizes. Each bit has a specific job: from lifting and separating the cuticle without damaging the nail, to smoothing and removing dry skin with pinpoint precision.
The origins of the Russian technique
Although the name links it to Russia, the technique was refined at the same time in several Eastern European countries —Russia, Ukraine and Belarus— during the 2000s. Nail professionals there developed very demanding e-file protocols that put the health of the natural nail first. From 2015 onwards, the Russian technique began to spread to salons in Germany, Italy and Spain, where today it's one of the most requested options among clients who want a flawless finish.
Its popularity in Western Europe comes down to one thing: clients found that their polish lasted noticeably longer when the cuticle prep was done with a bit instead of the wet method. Word of mouth did more than any advertising campaign.
Key features of a Russian manicure
- Dry technique: The nails aren't soaked in water before the work starts. The cuticle is treated as it is, which stops the nail from swelling and then shrinking (a common reason polish lifts).
- Specific bits: Between 3 and 6 different bits are used depending on the condition of each nail. The most common are the bullet (or flame) bit to lift the cuticle, the needle bit to clean the sides and the ball bit to smooth the edges.
- Controlled speed: The e-file is used at low to medium speeds (between 10,000 and 20,000 RPM depending on the bit and the area). An experienced technician never works at full power directly on the cuticle.
- A clean result: The outline of the nail is fully defined, with no leftover skin or irregularities. It's especially noticeable with dark colours or detailed designs.
Russian Manicure Step by Step: How the Technique Is Done
If you've never had a Russian manicure, it's normal to feel a little unsure about the e-file. In skilled hands, though, it's more comfortable than it looks. This is how a typical appointment goes:
Preparing and cleaning the nail
- Disinfecting: Each nail is cleaned with a specific disinfectant to remove oils and any leftover product. If you're wearing old polish, mention it when you book so removal time can be added.
- Gently pushing back the cuticle: A sterilised metal pusher separates the cuticle from the nail plate. This step is quick and painless; it simply loosens the skin stuck to the nail.
- Individual assessment: The technician looks at each nail separately. Not all cuticles are the same: some are thicker, others more stuck down, and that decides which bits will be used.
Products and cuticle treatment
- Flame or bullet bit: This is the first bit to go in. It's used to lift and separate the cuticle from the nail plate cleanly, always working from the centre outwards. The angle of contact (about 45°) is crucial: too flat and it won't clean, too upright and it can scratch.
- Needle or cone bit: Used to clean the side grooves (the folds of skin along the sides of the nail). It's the finest bit and needs the most precision.
- Ball bit: Once the cuticle is removed, this bit smooths the outline and gets rid of any remaining dead skin. The result is a perfectly defined edge.
- Buffing: Optionally, a soft buffer is passed over the nail surface to remove irregularities without thinning the nail. This step is particularly useful if you're having gel nails or acrylics afterwards.
Finishing and sealing
- Brushing off: A small soft brush removes all the dust. The area is disinfected again.
- Dehydrator and primer (if polish is applied): These prepare the nail for the best possible adhesion. The dehydrator removes any remaining moisture; the primer creates a layer for the product to grip.
- Applying the polish or chosen treatment: Now the product you've chosen —gel polish, builder gel, a plain manicure with a nourishing seal, etc.— is applied on a perfectly clean base.
- Cuticle oil: The appointment finishes with nourishing oil around the nail to moisturise the treated area.
The whole Russian manicure usually takes around 45-60 minutes including polish, although it depends on the condition of your cuticles and the finish you choose. On our menu it isn't a separate service: see our manicure services for the options.
Russian vs Traditional Manicure: The Key Differences
This is the comparison clients look up most before deciding. Let's go point by point:
Technique and precision
A traditional manicure uses warm water (to soften the cuticle), a pusher and nippers. It's a manual method, quicker but less precise. The Russian technique uses rotating bits of different sizes, so it can reach areas that are hard to get to with nippers without pinching.
The difference is most noticeable along the sides of the nail and around the eponychium (the fine skin around the base). With a bit, that area is left clean with no cuts or tugging.
How long it lasts
This is the most tangible advantage of a Russian manicure: how long the polish lasts. Because the nail isn't soaked before the product goes on, it doesn't expand. When polish is applied to a dry, perfectly clean nail, adhesion is much better.
In practice, that means less lifting at the edges during the first few weeks. If you often have common gel polish problems such as early peeling, Russian prep can make all the difference.
The final look
A Russian manicure looks visibly cleaner. Because the cuticle is removed evenly, the polish can be applied closer to the base of the nail without touching the skin. That makes the nail look longer and gives a sharper outline.
With dark polishes (deep reds, black, navy), the difference is obvious: no gaps or uneven lines between the cuticle and the colour.
Upkeep
Both types of manicure need upkeep, but the timing can vary. A Russian manicure usually needs a touch-up every 3-4 weeks, depending on how fast your nails grow. A traditional manicure, with weaker adhesion, may need more frequent visits if you want a consistently flawless finish.
One important point: a Russian manicure requires the technician to be specifically trained in using an e-file. It isn't a service every salon can offer reliably.
The Benefits of a Russian Manicure for Your Nails
Longer-lasting results
As we've seen, dry prep improves polish adhesion. In normal conditions, a Russian manicure with gel polish can look flawless for 3-4 weeks without significant lifting. That's especially useful if you work with your hands (hospitality, cleaning, hairdressing) or simply prefer to space out your salon visits.
A more professional, polished finish
The precision of the bits allows a level of detail that's very hard to achieve with hand tools. The outline is perfectly symmetrical and clean, so your nails look more cared for even at a glance.
This finish is also the ideal base if you then want gel, polygel or acrylics, as the nail surface is perfectly prepared for any building system.
Fewer breaks and less peeling
Because the cuticle isn't cut with nippers (which can cause microscopic cuts and harder skin as it grows back), a Russian manicure reduces hangnails and hard skin around the nail. The cuticle is removed more gently and the surrounding skin stays more supple.
Better care for natural nails
A well-handled e-file doesn't thin the nail. The bits work on the cuticle and skin, not on the nail plate. In fact, a well-done Russian manicure can improve the overall health of your nails by removing excess cuticle that gets in the way of healthy growth.
If you've been wearing artificial nails for a while and want to give them a break, combining a full removal and repair manicure with the Russian technique is a good way to get your natural nails back.
Aftercare for Your Russian Manicure
Nail care after a Russian manicure is simple but important for keeping the result.
The first 24 hours
- Avoid soaking your hands for at least 2 hours if you're wearing gel polish. Although the product is cured under a UV/LED lamp at the salon, too much moisture too soon can weaken the bond.
- Don't fiddle with your cuticles. The treated area may feel slightly sensitive, especially the first time. It's completely normal and goes within a few hours.
- Apply cuticle oil at night. A couple of drops per nail, massaged in gently. It moisturises the area and helps the cuticle grow back healthily.
Daily and weekly care
- Cuticle oil every day: It's the single habit that does most for how long your manicure lasts and how it looks. You can use jojoba, argan or a dedicated cuticle blend.
- Hand cream often: Especially after washing your hands. Soaps dry out the skin and speed up dry skin around the nail.
- Gloves for housework: Washing up, using cleaning products or handling hot water are the three main enemies of any manicure. A pair of rubber gloves is the simplest way to make the result last.
What to avoid to make it last
- Don't use your nails as tools: Opening cans, scraping labels or prising off lids puts sideways pressure on the nail that can cause lifting.
- Avoid pure acetone: If you need to remove your manicure, have it done at a professional salon. Concentrated acetone dries out the nail and cuticle, undoing some of the care.
- Don't pick off polish that starts to lift: If you notice a little lifting, it's better to pop into the salon for a quick touch-up than to pull the product off, which takes layers of natural nail with it.
Who Is a Russian Manicure For, and When Should You Avoid It?
A Russian manicure suits most people, but there are a few nuances:
It's ideal for you if:
- You have thick or fast-growing cuticles.
- You want your polish to last longer without lifting.
- You love a very clean, defined finish.
- You want a more precise alternative to nippers.
Check first if:
- You have an active infection around the nails (fungus, paronychia). The infection needs treating before any work is done.
- You take anticoagulants. Work with a bit rarely causes bleeding, but let your technician know.
- You have nail psoriasis or another skin condition affecting your nails. A professional will judge whether it's appropriate or whether a gentler plain manicure is better.
As always, if you have questions about a specific condition, check with a dermatologist before your appointment.
Frequently Asked Questions about Russian Manicures
Does a Russian manicure hurt?
It shouldn't. With a trained professional, a Russian manicure is comfortable and even relaxing. The e-file runs at controlled speeds and the diamond bits are designed to remove cuticle without damaging living skin. You may feel a slight vibration or tickle, especially along the sides of the nail, but nothing you could call pain. If you feel any discomfort, the technician will normally adjust the speed or change the bit straight away. Many clients say the second visit is more comfortable than the first, simply because they know what to expect.
Is a Russian manicure safe for your nails?
Yes, as long as it's done by professionals specifically trained in using an e-file. The key is that the bits work on the cuticle and dead skin, not on the nail plate. Used correctly, the micromotor doesn't thin or weaken the natural nail. In fact, the Russian technique can help improve the overall condition of your nails by removing excess cuticle that traps moisture and gets in the way of healthy growth. What matters is not trying to copy the technique at home with cheap e-files and no training: that's where there's a real risk of damaging the nail or the surrounding skin. Always trust a professional salon.
Can I combine a Russian manicure with gel polish?
It's the most popular combination and, in fact, the most recommended. Russian cuticle prep leaves the nail in perfect condition for gel polish, getting the most out of its adhesion and wear. The polish is applied closer to the base of the nail, covering more of the surface with a cleaner finish. You can also combine Russian prep with gel nails, acrylics or even a polish-free manicure focused purely on nail care. There's a wide range of options, and Russian prep is the ideal base for any of them.
How long does a Russian manicure last?
A Russian manicure with gel polish stays looking good for around 3-4 weeks for most people. That depends on individual factors such as how fast your nails grow, how much you're exposed to water and chemicals, and the care you give them at home. Using cuticle oil every day and wearing gloves for cleaning can easily keep the result going into the fourth week. After that, it's usual to go back to the salon for maintenance, including removal of the old polish and fresh Russian prep.
How often can I have a Russian manicure?
Usually once every 3-4 weeks, in line with how fast the cuticle grows. There's no benefit in doing it more often: the cuticle needs time to grow back, and too much treatment could irritate the area. If your cuticle grows fast between appointments, daily nourishing oil is a better answer than bringing your appointment forward. In exceptional cases —before a big event, for example— a light touch-up can be done at 2 weeks, but not as a routine.
Does a Russian manicure damage your nails in the long run?
No, not if it's done properly. It's one of the most common worries, and the answer is clear: professional Russian technique respects the integrity of the natural nail. The bits only work on dead tissue (cuticle, pterygium, dry skin), not on the nail plate. Clients who've had regular Russian manicures for years keep strong, healthy nails. Problems appear when an e-file is used without proper training or pressed too hard on the nail, which should never happen in a professional salon.
What's the difference between a Russian manicure and a gel manicure?
They're different things that complement each other. A Russian manicure is a prep method for the cuticle and nail. Gel is a type of product applied to the nail once it's prepped. You can have a Russian manicure and then gel, gel polish, acrylics or nothing at all on top. And the other way round: you can have gel with traditional prep (no Russian technique). The difference is that Russian prep gives a cleaner, longer-lasting base for whatever product you choose. To compare the different nail systems, see our guide to gel, polygel or acrylics.
Your Next Russian Manicure in Gandia and Ontinyent
If you're looking for a Russian manicure in Gandia or Ontinyent, it's worth knowing that at Adrian Beauty Studio it doesn't appear as a separate service on our menu. The closest options are the full manicure without polish (€12, 20 min: filing, cuticles and moisturising) or gel polish (€20, 35 min), which also includes cuticle work.
You can book your appointment at our salon in Gandia or our salon in Ontinyent and choose the finish you prefer: gel polish, gel, natural or simply cuticle care. Check the details and availability on our manicure services page.
Quick reference: types of manicure
| Type | How long it lasts | Appointment | Adds length? |
|---|---|---|---|
| Gel polish | 2-4 weeks | 35-45 min | No |
| Gel on natural nails, no extension (formerly “semigel”) | 3-4 weeks | 55 min | No |
| Gel/Polygel with extension | 3-4 weeks | 70-90 min | Yes |
| Acrylics | 3-5 weeks | 80-100 min | Yes |
| OPI polish | 5-7 days | 30 min | No |