Classic OPI Manicure: Technique, How Long It Lasts and Aftercare
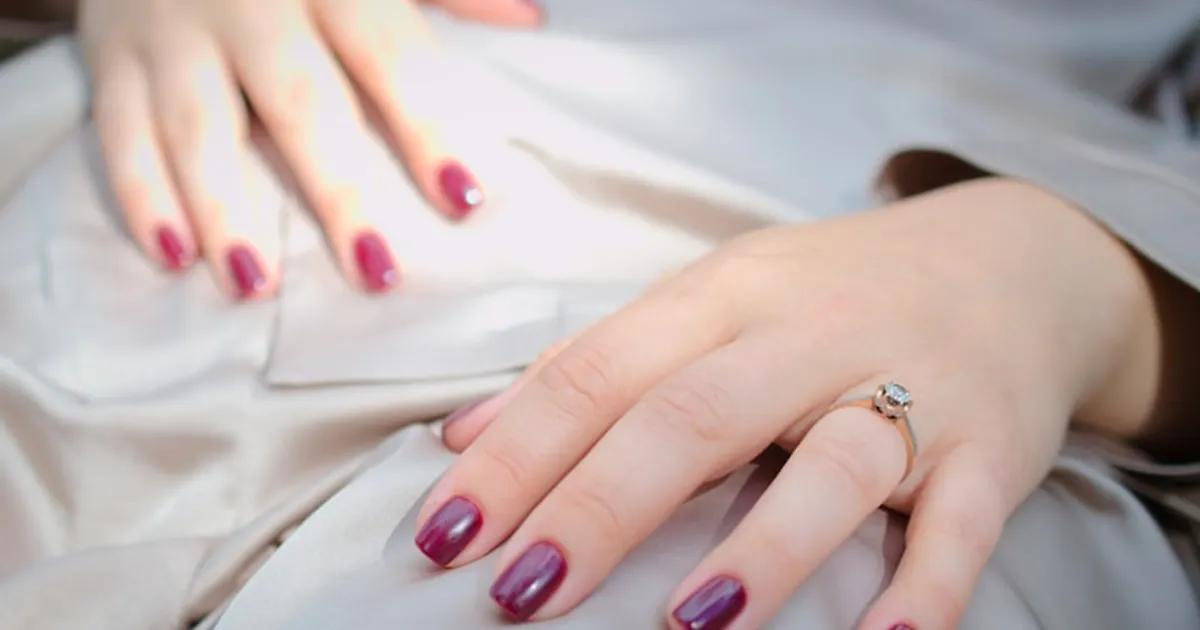
Classic OPI polish is still one of the most requested manicures: over 200 shades, no UV lamp and removal without filing. Here's how it's done and how to make it last.
Classic OPI nail polish is still one of the most requested options in a professional manicure, and for good reason. There are more than 200 shades to choose from, it's kind to your natural nails because no UV lamp is needed, and it comes off without filing or harsh acetone. If you want a pretty finish without compromising the health of your nails, this guide explains exactly what to expect, how it's applied at the salon and what to do to make it last as long as possible. You'll find it under manicures in Gandia and manicures in Ontinyent.
What is a classic OPI manicure?
A classic OPI manicure uses regular nail polish from OPI, one of the best-known professional brands in the industry. Unlike gel polish in Gandia or gel, this polish air-dries (or dries faster with quick-dry drops or spray) and doesn't need curing under an LED or UV lamp. Also available: gel polish in Ontinyent.
OPI's formula stands out for its concentrated pigment, which gives even coverage in two thin coats. Its polishes are also free from formaldehyde, toluene and DBP (the so-called "3-Free"), which makes them gentler on the nail plate than many supermarket or pharmacy polishes.
OPI refreshes its colour range every season with themed collections, so the choice is practically endless: from nudes and pinks to bold reds, deep blues and shimmer or glitter finishes.
Classic polish vs gel or gel polish
The key difference is how it dries and how long it lasts. Regular polish dries as the solvent evaporates, while gel and gel polish cure under a UV/LED lamp, creating a hardened layer that bonds chemically to the nail.
In practice, this means a classic OPI manicure lasts 5 to 7 days with the right care, compared with 2-4 weeks for gel polish. In return, removal is instant (cotton pad and polish remover) and there's none of the wear that the filing needed to remove gel can cause.
If you'd like a detailed comparison of both systems, we have a dedicated article: Classic Polish vs Gel and Gel Polish.
Why classic OPI polish is good for your nails
Choosing regular polish isn't "settling for less". It's a conscious choice with real advantages over other systems:
Zero damage to the natural nail. The nail surface isn't buffed to improve adhesion (as it is with gel or gel polish). That makes it the best option for thin nails, nails weakened by previous treatments or nails that are recovering. If strengthening your nails is your priority, pairing OPI polish with a natural nail care routine works really well.
Change colour often, with no downside. Like matching your nails to every outfit or every week? With regular polish, you can. Removal doesn't wear the nail down and application is quick.
A more affordable price. As there's no lamp and no professional removal products involved, a classic OPI manicure is one of the most affordable options at a professional salon: €15 for an appointment of around 30 minutes. You can check up-to-date prices on our service page.
A genuinely professional finish. There's a real difference between painting OPI on at home and having it done at the salon. Cuticle prep, even coats and capping the free edge are what separate a polish that chips in 3 days from one that lasts all week.
Unbeatable choice of colours. With over 200 shades — many exclusive to the professional line — OPI offers tones you won't find in high-street brands. The Hollywood, Lisbon and Tokyo collections and the limited editions go far beyond a classic red.
How it's applied at the salon
A classic OPI manicure at a professional salon follows a set routine that looks after both how long it lasts and the health of your nail. Here's what happens, step by step, when you book.
Prepping the nail properly
This is the most important stage and what sets it apart from doing your nails at home. Before a single bottle of colour is opened, your technician spends 5 to 10 minutes prepping the nail:
- Removing old polish: any existing polish (regular or gel polish) is fully removed. If you're coming in with gel polish, mention it when you book so extra time can be allowed.
- Filing and shaping: the nail is shaped to your liking (almond, square, squoval, oval) with a medium-grit file (180/240). Filing is always done in one direction so the nail layers don't split.
- Cuticle work: a cuticle softener (such as OPI ProSpa Cuticle Oil or similar) is applied and left for a couple of minutes, then the cuticle is pushed back with a metal or orangewood pusher. Only hangnails or obvious excess skin are trimmed, never the whole cuticle.
- Dehydrating: the nail surface is wiped with a dehydrating prep to remove any oil or product residue. This step is key: skip it and the polish lifts or chips much sooner.
Applying the OPI polish
Once the nail is clean, dry and residue-free, the application begins:
- Base coat: a thin layer of OPI base (Natural Nail Base Coat, or the strengthening OPI Nail Envy if the nail needs it). The base protects the nail from staining and improves adhesion.
- First colour coat: a thin, even coat of your chosen shade, using three strokes — one down the middle and one on each side — always capping the free edge (the tip of the nail). Thick coats = bubbles and uneven drying.
- Second colour coat: the same technique is repeated after waiting a couple of minutes. Two thin coats always beat one thick one.
- Top coat: the final seal. OPI has several options: classic gloss, matte, or the popular Infinite Shine Top Coat with a gel-like effect. The top coat protects the colour, adds shine and makes the polish more resistant to everyday wear.
Drying and finishing touches
Drying is the weak spot of regular polish compared with gel, but at a professional salon it's handled efficiently:
- Quick-dry drops or spray (such as OPI DripDry or RapiDry Spray) speed up solvent evaporation and leave the surface touch-dry in 1-2 minutes.
- Even when the surface feels dry, the layers underneath need around 30-45 minutes to harden fully. That's why it's best not to carry anything heavy or rummage in your bag straight after your appointment.
- Some salons finish with a touch of cuticle oil to hydrate the skin around the nail and give a polished look.
The whole process — from prep to drying — takes around 30 minutes; if gel polish needs removing first, add 10 minutes (+€3).
How long does a classic OPI manicure last?
A realistic expectation for a classic OPI manicure done at the salon is 5 to 7 days with no visible chips. Some clients keep it perfect for up to 10 days, while others notice wear after 3-4. What does it depend on?
- How much you use your hands: if your work is hands-on (cooking, frequent cleaning, gardening), it wears faster. Repeated contact with water and detergent is enemy number one.
- Nail prep: a properly dehydrated nail and a capped free edge can double how long it lasts.
- Type of top coat: quick-dry, gel-effect top coats (such as OPI Infinite Shine) create a tougher film than classic top coats.
- Aftercare habits: wearing gloves for washing up, using cuticle oil every day and not using your nails as tools all help your polish last longer.
If you need it to last more than a week without touch-ups, gel polish or gel nails are probably more practical for your day-to-day life.
Care before and after your manicure
Before your appointment
You don't need to do anything special before a classic polish appointment, but these little things help:
- Don't use hand cream in the 2 hours beforehand. Leftover oil makes it harder for the polish to grip.
- If you're wearing polish already, let us know when you book. If it's gel polish, removal adds 10 minutes and €3 to the appointment.
- Bring a colour reference if you have one in mind. A photo on your phone is perfect for your technician to suggest the closest OPI shade.
- Don't cut or file your nails just before your appointment. Shaping is part of the service.
The first 24 hours
The first few hours after application are the most important:
- Don't put your hands in hot water for at least 2-3 hours. No washing up, long baths or swimming pool.
- Avoid knocks or pressure on your nails. Even if the surface feels dry, the inner layers take hours to harden completely.
- Don't apply thick hand cream over freshly painted nails. You can moisturise the rest of your hand, avoiding the nails.
- Watch out for the seatbelt when you get in the car: it's the classic moment a fresh manicure gets smudged.
Day-to-day care to make it last
After the first 24 hours, these habits make all the difference:
- Wear gloves for cleaning. Contact with detergent, bleach and cleaning products is the number one cause of early chipping.
- Use cuticle oil every night. It keeps the area supple and stops dry cuticles from dragging the polish as they grow.
- Reapply top coat every 3-4 days. A thin coat of clear top coat refreshes the shine and adds extra protection. You can do it at home with any retail OPI top coat.
- Don't use your nails as tools. Opening cans, picking at labels or typing with your fingertips all lift the polish from the free edge.
Common mistakes and how to avoid them
These are the most common slip-ups that shorten the life of a classic manicure:
Applying coats that are too thick. More product doesn't mean it lasts longer. Thick coats take longer to dry, bubble and chip off in chunks. Always two thin coats.
Skipping the base coat. Applying colour straight onto the bare nail causes two problems: weaker adhesion and pigment stains on the nail (especially with reds and dark shades) that take weeks to grow out.
Not capping the free edge. The tip of the nail is where most chips start. Every coat (base, colour and top coat) should lightly "wrap" that edge.
Using pure acetone for frequent removal. Pure acetone dries out the nail and cuticle. A gentler remover or one enriched with oils is better (OPI Expert Touch is a good choice), followed by moisturising.
Not waiting for it to dry fully. Leaving the salon and getting straight on with things is the fastest way to ruin a perfect manicure. Those 30 minutes of patience pay off.
Who is a classic OPI manicure ideal for?
Regular polish is a particularly good fit for:
- Weak or recovering nails after acrylic nails in Gandia, gel or long-term gel polish. If you've just had your gel or acrylic nails removed, OPI polish lets you wear colour while your nails recover. Also available: acrylic nails in Ontinyent.
- Clients who change colour every week. If you get bored of the same shade quickly, regular polish gives you total freedom.
- One-off occasions. A dinner, a wedding, an interview: when you need perfect nails for 5-7 days without committing to gel polish.
- Teenagers and first manicures. With no lamp and no buffing, it's the gentlest option for young nails.
- Anyone who wants a plain manicure with a touch of colour. You can combine a full hand-care treatment with a splash of colour, no strings attached.
If, on the other hand, you need polish that lasts more than two weeks without touch-ups, Shellac gel polish or gel options are a better fit. You can explore the differences in our gel nails guide.
Frequently asked questions about classic OPI polish
Is regular polish better than gel?
Neither is better or worse: they're different services for different needs. A classic OPI manicure is ideal when you put the health of your natural nail first, like to change colour often or want an affordable option for a one-off event. Gel, on the other hand, lasts longer (3-4 weeks) and is tougher, but needs filing to remove and a commitment to regular infills. For a detailed comparison, have a look at Classic Polish vs Gel and Gel Polish, where we go through the pros, cons and costs of each system.
When should I choose regular polish?
Go for a classic OPI manicure if your nails are weak, you like changing colour every week, you have an event in the next few days or you'd rather avoid the UV/LED lamp. It's also the best option during pregnancy or breastfeeding: with no harsh removal products and no lamp exposure, there's very little to worry about. For nails that need a "rest" after months of gel polish or acrylics, OPI polish lets you wear colour while your nails get stronger naturally.
Can I do a classic manicure at home?
Technically yes, but the result is noticeably different. At the salon, cuticle prep, dehydrating the nail, controlled thin coats and capping the free edge are all done with professional tools and products that you don't usually have at home. In our experience, a professional manicure lasts quite a bit longer than the same colour applied at home. If you'd still rather do it yourself, always use a base coat, two thin coats of colour and a top coat, and let each coat dry fully.
Which OPI colours are on trend?
OPI updates its range every season with themed collections. In 2026, the most requested shades at the salon are rosy nudes (like Bubble Bath, a timeless classic), cherry reds (Big Apple Red), butter and caramel tones for natural looks, and burgundy and plum for special occasions. Micro-shimmer finishes are also popular, giving a subtle glow without obvious glitter. If you'd like to explore more creative designs on top of your polish, take a look at this season's nail art trends.
Does it last longer if I have it done at a salon?
Yes, and the difference is noticeable. Professional nail prep (cleaning, dehydrating, cuticle work) creates the ideal conditions for the polish to bond properly. On top of that, thin coats with a capped free edge prevent early chipping. At a professional salon, a classic OPI manicure usually lasts 5 to 7 days without touch-ups. At home, without proper prep, the first chips often appear after 3-4 days. A professional application is worth it if you want the result to last.
Is regular polish safe for weak nails?
It's the safest of all the professional polish options. With no buffing of the nail surface and no UV lamp, a classic OPI manicure fully respects the structure of the nail plate. The OPI Nail Envy line, used as a strengthening base, even contains hydrolysed keratin and calcium that reinforce the nail with every application. If your nails are particularly damaged, your technician may suggest alternating polish with a plain manicure focused on hydration and strengthening.
Where can I get a classic OPI manicure in Gandia and Ontinyent?
At Adrian Beauty Studio we offer classic OPI manicures at both our salons in the province of Valencia. You can visit our Gandia salon, in the La Safor area, or our Ontinyent salon, in the Vall d'Albaida. Both salons work with the full professional OPI colour range and follow the same application routine, so you get a consistent result.
Classic OPI manicures at Adrian Beauty Studio
Whether you visit us in Ontinyent or at our Gandia salon, the classic OPI service includes a full manicure: filing, cuticle work, hydration and polish with base coat, two coats of colour and a professional top coat. It costs €15 and the appointment takes around 30 minutes (if you're wearing gel polish, removal adds €3 and 10 minutes).
We work with the full professional OPI range, including seasonal collections and special finishes (matte, shimmer, gel-effect). Your technician will help you choose the shade that best suits your skin tone and the occasion.
If it's your first time or you fancy trying something different, just ask for advice: every nail and every lifestyle calls for a different approach, and that's what we're here for.
You can book your classic OPI manicure online and choose the salon, day and time that suit you best.
Quick reference: types of manicure
| Type | Lasts | Appointment | Adds length? |
|---|---|---|---|
| Gel polish | 2-4 wks | 35-45 min | No |
| Gel, no extension (formerly “semigel”) | 3-4 wks | 55 min | No |
| Gel/Polygel with extension | 3-4 wks | 70-90 min | Yes |
| Acrylic | 3-5 wks | 80-100 min | Yes |
| OPI | 5-7 days | 30 min | No |